Best at home keratin treatment – Best at-home keratin treatment: Unlocking salon-worthy results from the comfort of your own home. This comprehensive guide dives deep into the world of at-home keratin treatments, exploring everything from the different types of kits available to the crucial steps in application and long-term maintenance. We’ll also cover safety considerations, product comparisons, and troubleshooting common issues.
From choosing the perfect kit for your hair type to understanding the potential side effects, this guide equips you with the knowledge to confidently tackle your keratin treatment at home. Learn about ingredients, application techniques, and how to maintain your results for lasting smoothness and shine. This in-depth analysis will equip you with everything you need to make informed decisions and achieve beautiful results.
Introduction to At-Home Keratin Treatments
At-home keratin treatments have become increasingly popular as a way to achieve smoother, straighter hair. These treatments promise a significant improvement in hair texture, often resulting in reduced frizz and improved manageability. However, it’s crucial to understand the potential benefits and drawbacks before attempting this type of treatment at home. Proper preparation and understanding of the process are essential for achieving desirable results without compromising hair health.These treatments typically involve applying a chemical solution to the hair to alter its structure and promote a straighter, smoother appearance.
While often touted as a long-term solution, the effectiveness and safety of these treatments vary depending on individual hair type and the quality of the products used.
Types of At-Home Keratin Treatments
At-home keratin treatment options generally fall into two categories: kits and individual products. Kits usually contain all the necessary components for a complete treatment, while individual products may be purchased separately to achieve specific results or to address particular hair concerns. These individual products could include serums, masks, or conditioners, and are often marketed as supplements to enhance the results of a professional keratin treatment or to maintain the results over time.
Steps Involved in Applying At-Home Keratin Treatments
The application process for at-home keratin treatments generally involves several steps. A typical procedure involves thorough preparation of the hair, including cleaning and conditioning. The keratin solution is then applied to the hair, often section by section, and left to process according to the product instructions. After the processing time, the hair is thoroughly rinsed, and a neutralizing agent is often applied.
This process is followed by styling and final drying to achieve the desired outcome. It is essential to follow the specific instructions provided with the treatment kit precisely.
Typical Results Achievable with At-Home Keratin Treatments, Best at home keratin treatment
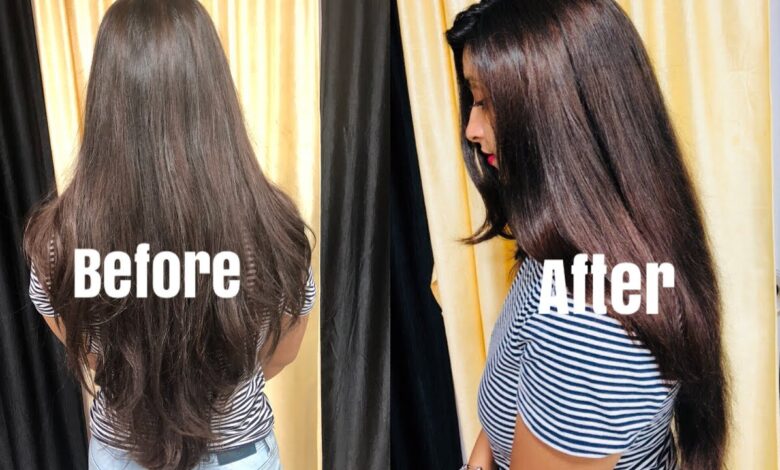
The results achievable with at-home keratin treatments can vary significantly. Some users report achieving a considerable reduction in frizz and a noticeable improvement in hair smoothness and manageability. However, the extent of the change depends on various factors, including the initial hair condition, the quality of the product, and the skill of the user in applying the treatment correctly.
The results typically last for several months, but the effects will gradually fade as the hair naturally grows out. Maintaining the results often requires additional treatments or using products designed to maintain the effect.
Comparison of At-Home Keratin Treatment Options
| Feature | Kit-Based Treatments | Individual Product Treatments |
|---|---|---|
| Cost | Generally more expensive due to the complete kit. | Potentially more affordable in the long run, but the cost may vary. |
| Ingredients | The ingredients are often clearly listed in the product description. | Individual products often focus on specific hair concerns or provide different results. |
| Effectiveness | Dependent on the quality of the product and proper application; can be effective for some but not for all. | Can be effective as a complementary treatment for managing frizz and maintaining the effect of a professional keratin treatment, but not a standalone solution for significant straightening. |
| Ease of Use | Kits often include detailed instructions. | Individual products often require more knowledge and skill to integrate into a hair care routine effectively. |
Ingredients and Safety Considerations
At-home keratin treatments offer a tempting DIY approach to achieving salon-quality results. However, understanding the ingredients and potential risks is crucial for a safe and effective experience. This section delves into the common components, possible side effects, and important safety precautions to take.Knowing the ingredients in your at-home keratin treatment is essential for understanding the potential risks and necessary safety precautions.
Mismatched ingredients can lead to negative reactions, so carefully reviewing the product label is paramount.
Common Ingredients
Understanding the composition of at-home keratin treatments is vital for recognizing potential hazards. Common ingredients include keratin proteins, formaldehyde (often in lower concentrations than professional treatments), thioglycolic acid (a reducing agent), and various preservatives and fragrances. The presence of these ingredients can vary depending on the specific product.
Potential Side Effects and Safety Precautions
Applying at-home keratin treatments carries inherent risks, making precautions essential. Common side effects include skin irritation, redness, itching, and allergic reactions. Serious reactions are rare but can occur. Always perform a patch test before applying the treatment to the entire head.
Allergic Reactions and Sensitivities
Certain ingredients in keratin treatments can trigger allergic reactions in susceptible individuals. Thioglycolic acid, fragrances, and preservatives are common culprits. Individuals with a history of allergies or sensitivities to hair products should exercise extreme caution.
Patch Test Procedure
A patch test is a crucial safety measure before applying the entire treatment. Apply a small amount of the product to a discreet area, like the inner wrist or behind the ear, and monitor for any adverse reactions for 24-48 hours. If no irritation develops, the treatment can be applied to the entire head.
Handling Skin Irritation or Allergic Reactions
Skin irritation or allergic reactions may manifest as redness, itching, or swelling. Immediately discontinue use if such reactions occur. Follow the product instructions for dealing with reactions, and seek medical advice if symptoms persist or worsen. Gentle cleansing with mild soap and water, and avoiding further use of the treatment, are initial steps.
Potential Hazards of Ingredients and Safety Measures
| Ingredient | Potential Hazards | Safety Measures |
|---|---|---|
| Keratin Proteins | Generally safe, but may cause mild irritation in some individuals. | Perform a patch test. |
| Formaldehyde (often in lower concentrations) | Potential skin and respiratory irritant. Inhalation of fumes can be hazardous. | Ensure adequate ventilation during application. Follow product instructions carefully. |
| Thioglycolic Acid | Can cause skin irritation, burns, and allergic reactions. | Perform a thorough patch test. Avoid contact with eyes. Use gloves. |
| Preservatives | Potential skin irritants or allergens. | Perform a patch test. Avoid contact with eyes. |
| Fragrances | Can cause allergic reactions or skin irritation in sensitive individuals. | Perform a patch test. Choose fragrance-free products if possible. |
Choosing the Right At-Home Keratin Treatment
Deciding on the right at-home keratin treatment can be daunting with so many brands and options available. Understanding the factors that influence your choice is key to achieving your desired results without unnecessary risks. This guide will help you navigate the process and select a treatment that’s tailored to your specific needs and hair type.Choosing the right at-home keratin treatment involves careful consideration of various aspects, from the ingredients and safety precautions to the desired outcome.
Knowing your hair type, budget, and the level of commitment required will empower you to make an informed decision.
Comparing Different Brands and Types
Various brands offer at-home keratin treatment kits, each with unique formulations and claims. Some kits focus on specific hair concerns, such as frizz reduction or volume control, while others aim for a more comprehensive transformation. Understanding the differences between these options is crucial for selecting the most appropriate treatment for your hair. This involves comparing ingredients, application methods, and user reviews to determine the best fit for your hair type and budget.
Factors to Consider When Selecting
Several crucial factors influence the choice of an at-home keratin treatment. Your hair type plays a significant role; different treatments cater to various textures and needs. Curly, straight, thick, or fine hair may respond differently to various formulas. Budget is another key factor. Treatments range from affordable options to higher-priced, specialized formulas.
The desired results, such as straightening, reducing frizz, or enhancing shine, should also guide your decision. Prioritizing these aspects will ensure you choose a treatment that effectively addresses your hair’s specific needs and aligns with your financial capacity and desired outcome.
Importance of Reading Product Labels
Thorough reading of product labels is essential for understanding the treatment’s ingredients, application instructions, and potential risks. Pay close attention to the ingredients list to identify any potential allergens or irritants. Following the instructions meticulously is crucial for achieving optimal results and minimizing risks. Clear instructions regarding application, processing time, and post-treatment care are essential for safe and effective use.
Product Options and Their Pros and Cons
Several product options are available in the market, each with its advantages and disadvantages. Some popular brands include [Brand A], known for its [specific benefit], and [Brand B], offering a [different benefit]. [Brand A]’s formula is [description], while [Brand B]’s treatment is [description]. These characteristics contribute to each brand’s strengths and weaknesses.
- [Brand A]: Pros: [Pros]; Cons: [Cons]. This product often offers [Specific Feature] which can be beneficial for [Target Hair Type]. For example, it is often preferred by users who desire [Specific Outcome].
- [Brand B]: Pros: [Pros]; Cons: [Cons]. This treatment often provides [Specific Feature] which is beneficial for [Target Hair Type]. For instance, it might be better for those seeking [Specific Outcome].
Summary Table of Popular Brands
The table below summarizes key features of popular at-home keratin treatment brands, providing a quick overview for comparison.
| Brand | Hair Type | Key Features | Pros | Cons |
|---|---|---|---|---|
| [Brand A] | [Hair Type description] | [Key Features] | [Pros] | [Cons] |
| [Brand B] | [Hair Type description] | [Key Features] | [Pros] | [Cons] |
| [Brand C] | [Hair Type description] | [Key Features] | [Pros] | [Cons] |
Application Procedures and Techniques
Applying a keratin treatment at home requires precision and attention to detail. Improper application can lead to uneven results, damage, and even safety concerns. This section provides a step-by-step guide, highlighting crucial techniques and common mistakes to avoid. Following these procedures ensures a smooth and effective treatment.
Step-by-Step Application Process
A meticulous approach to application is key for achieving desired results. Each step plays a vital role in ensuring even distribution of the keratin treatment and optimal outcome. Consistency in application is crucial to achieve a uniform finish.
| Step | Action | Important Considerations |
|---|---|---|
| 1. Preparation | Thoroughly cleanse and dry the hair. Ensure hair is completely dry before applying the treatment. Section the hair into manageable subsections, ideally 1-2 inch wide. | Use a clarifying shampoo to remove any product buildup. Avoid using conditioner or styling products before applying the keratin treatment. |
| 2. Application of the Treatment | Apply the keratin treatment to each section of hair, ensuring even distribution from root to tip. Use a fine-toothed comb or a keratin application brush to evenly coat each section. | Apply the treatment in small, controlled sections. Avoid overlapping sections, as this can lead to uneven application. Use a comb to distribute the product through the hair strands. |
| 3. Maintaining Temperature and Time | Precise temperature and time are critical. Follow the manufacturer’s instructions regarding temperature settings and application time. Monitor the hair’s reaction throughout the treatment. | Use a heat-protective spray before applying heat. Use a professional-grade hair dryer or a specialized keratin treatment applicator for heat control. Monitor the hair’s temperature using a thermometer, if available. |
| 4. Neutralization | Neutralize the keratin treatment according to the manufacturer’s instructions. This process typically involves a specific time and solution. | Carefully follow the manufacturer’s instructions regarding the neutralizing solution. Avoid mixing or altering the recommended procedures. |
| 5. Final Rinse and Styling | Thoroughly rinse the hair with lukewarm water, ensuring all the product is removed. Use a moisturizing conditioner. Style as desired. | Avoid using heat styling tools immediately after the treatment. Allow the hair to air dry or use a low heat setting. |
Methods for Even Application
Ensuring even application of the keratin treatment is crucial for achieving a smooth, consistent result. Employing specific techniques helps distribute the treatment uniformly throughout the hair.
- Sectioning Hair: Dividing the hair into manageable sections prevents overlapping and ensures each strand receives an adequate amount of treatment. This ensures that each part of the hair is uniformly treated, preventing uneven distribution and improving overall results. Using a fine-toothed comb or keratin application brush is also recommended to distribute the treatment through the hair.
- Using a Keratin Brush: A keratin brush is designed for even application. It aids in distributing the product evenly and prevents clumping. A brush specifically designed for this purpose can help achieve a uniform distribution, improving overall application quality.
- Comb-Based Application: A fine-toothed comb allows for thorough distribution and coverage. Using a comb aids in penetrating the hair strands to achieve uniform coverage, minimizing potential clumps or unevenness. The comb should be used to spread the treatment across each section from the roots to the ends.
Maintaining Correct Temperature and Time
Precise temperature control and adherence to the treatment time are essential for optimal results. These factors directly influence the efficacy and safety of the treatment.
- Temperature Monitoring: Use a thermometer to monitor the hair’s temperature during the treatment process. This ensures the temperature remains within the safe range recommended by the manufacturer. Checking the hair temperature throughout the process is crucial to avoid damaging the hair.
- Time Management: Adhering to the exact application time specified by the manufacturer is crucial. Exceeding or shortening the time can negatively impact the treatment’s efficacy. Carefully follow the instructions to avoid over-processing or under-processing the hair. Accurate timing is essential for proper keratin bonding and treatment.
- Manufacturer’s Instructions: Always follow the manufacturer’s instructions regarding temperature and time. Deviation from these instructions can compromise the treatment’s effectiveness and lead to adverse outcomes.
Common Mistakes to Avoid
Avoiding common errors is vital for achieving satisfactory results and preventing potential issues. Careful attention to these points is critical for successful at-home keratin treatment.
- Insufficient Sectioning: Failing to section the hair adequately can lead to uneven application. Smaller, more manageable sections facilitate better distribution.
- Inadequate Drying: Applying the treatment to wet hair will result in uneven distribution and reduced effectiveness. Thorough drying is critical before application.
- Ignoring Manufacturer’s Instructions: Deviation from the manufacturer’s instructions regarding temperature, time, or other aspects of the treatment can compromise the outcome. Always follow the instructions meticulously.
Maintaining Results and Long-Term Care: Best At Home Keratin Treatment

Achieving salon-worthy results from your at-home keratin treatment hinges significantly on post-treatment care. Proper maintenance ensures your new, sleek style lasts longer and your hair remains healthy. Following these guidelines will help you maximize the benefits of your keratin treatment and enjoy its transformative effects for months to come.
Aftercare Recommendations
A crucial aspect of successful keratin treatment is meticulous aftercare. This involves adhering to specific guidelines to protect the treated hair and maintain its straightness. This period of vigilance is essential to allow the keratin to bond effectively and prevent the hair from reverting to its previous texture.
Avoiding Certain Hairstyles and Activities
To maintain the smoothness and straightness achieved through your keratin treatment, it’s vital to avoid certain hairstyles and activities immediately following the treatment. Excessive heat styling, tight braids, and harsh chemicals should be avoided for at least 2-4 weeks, allowing the keratin to fully bond with the hair shaft. This period of restraint is crucial to prevent damage and maintain the treatment’s results.
- Avoid tight ponytails, braids, or buns for the first few weeks after treatment. These styles can put undue stress on the hair and potentially cause it to revert to its previous texture.
- Refrain from using hot styling tools like flat irons or curling irons for the first two weeks to allow the keratin to fully bond to the hair.
- Limit the use of harsh chemicals, such as hair dyes or perms, until the keratin treatment has fully settled.
Frequency of Touch-Ups
The longevity of your keratin treatment’s results depends on several factors, including your hair type, lifestyle, and the quality of the treatment. Typically, touch-ups are required every 3-6 months. However, some individuals may need them sooner, depending on their hair’s growth rate and activity level.
Proper Use and Maintenance of Styling Tools
Maintaining healthy hair after a keratin treatment is directly tied to the appropriate use of styling tools. The use of lower heat settings and appropriate heat protection products will help in reducing damage to the treated hair. Using the right tools and techniques can help maintain the smooth and straight results for longer.
- Always use a heat protectant spray before using any heat styling tools.
- Use low to medium heat settings on your styling tools to prevent damage to the treated hair.
- Avoid using excessive heat, which can weaken the keratin bonds and cause the hair to revert to its previous texture.
Maintaining Healthy Hair After Treatment
A healthy diet and proper hair care routine are crucial for maintaining healthy hair after a keratin treatment. This will help the keratin treatment results last longer. Hydrating from within and from the outside will support the health of the hair and scalp.
- Consume a balanced diet rich in protein, vitamins, and minerals to support hair growth and health.
- Use moisturizing shampoos and conditioners specifically designed for keratin-treated hair. Avoid sulfates, which can strip the hair of its natural oils.
- Deep condition your hair at least once a week to keep it hydrated and prevent dryness.
Detailed Hair Care Routine
| Day | Morning Routine | Evening Routine |
|---|---|---|
| Monday | Gentle shampoo and conditioner | Deep conditioner and hair mask |
| Tuesday | Shampoo and conditioner | Leave-in conditioner |
| Wednesday | Shampoo and conditioner | Hair oil treatment |
| Thursday | Gentle shampoo and conditioner | Deep conditioner and hair mask |
| Friday | Shampoo and conditioner | Leave-in conditioner |
| Saturday | Shampoo and conditioner | Hair oil treatment |
| Sunday | Gentle shampoo and conditioner | Deep conditioner and hair mask |
Troubleshooting Common Issues
At-home keratin treatments can be a great way to achieve straight, smooth hair, but unexpected issues can sometimes arise. Understanding potential problems and how to address them is crucial for a positive experience and maintaining healthy hair. This section will equip you with the knowledge to troubleshoot common problems, ensuring your at-home keratin treatment journey is successful.Knowing how to identify the root cause of a problem is key to finding the right solution.
Sometimes, a hair issue that seems related to the treatment might actually be due to other factors, such as your hair type, the products you use, or even the environment. This section will help you distinguish between treatment-related problems and other hair care concerns.
Identifying Frizz and Dryness
Frizz and dryness are common complaints after keratin treatments, often stemming from improper application, product incompatibility, or insufficient post-treatment care. Understanding the underlying cause is essential for effective treatment. Frizz can manifest as unruly, flyaway strands, while dryness results in brittle, rough hair that feels lacking in moisture.
- Product Compatibility: Ensure the products you use (shampoo, conditioner, styling products) are sulfate-free and formulated for chemically treated hair. Harsh chemicals can strip the hair of its natural oils, leading to dryness and frizz.
- Insufficient Hydration: Keratin treatments can temporarily alter the hair’s natural moisture balance. Consistent moisturizing treatments are crucial for maintaining moisture and reducing frizz. Deep conditioning treatments, hydrating masks, and hair oils are excellent solutions.
- Incorrect Application: Uneven application of the keratin treatment can result in inconsistent results, causing frizz or dryness in some areas.
Addressing Uneven Results
Uneven results can be a significant concern after an at-home keratin treatment. Factors like improper application, inadequate product distribution, or even individual hair porosity can contribute to these inconsistencies.
- Uneven Product Application: Ensure the keratin treatment is thoroughly and evenly distributed throughout all sections of the hair. Pay extra attention to areas prone to unevenness, like the ends and the roots. Use a fine-tooth comb to ensure the treatment covers every strand.
- Hair Porosity: Hair porosity can influence how the treatment absorbs. Hair with high porosity might absorb the treatment differently than low porosity hair. Adjust the treatment time accordingly if necessary, or use different products based on hair porosity.
- Application Technique: Proper application technique is essential for achieving consistent results. Ensure you follow the instructions provided with your keratin treatment product carefully. Consider seeking guidance from a professional if needed.
Troubleshooting a Table
This table provides a quick reference for common problems and their potential solutions.
| Problem | Possible Causes | Solutions |
|---|---|---|
| Frizz | Product incompatibility, insufficient hydration, incorrect application | Use sulfate-free products, deep conditioning treatments, ensure even application |
| Dryness | Product incompatibility, insufficient hydration, over-processing | Use moisturizing products, deep conditioning treatments, adjust processing time |
| Uneven Results | Uneven product application, varying hair porosity, incorrect technique | Thorough application, consider hair porosity when selecting products, and follow application instructions carefully |
| Damaged Hair | Over-processing, harsh products, improper application | Use gentle products, consult a professional stylist, reduce processing time if needed |
Product Reviews and Comparisons

Finding the right at-home keratin treatment can be tricky. With so many brands and formulas available, it’s hard to know which one will deliver the best results for your hair type and needs. Real-life experiences and honest reviews can be invaluable in making an informed decision. This section delves into various user experiences, highlighting both the pros and cons of different products, and ultimately aiding your search for the perfect at-home keratin treatment.
Real-Life Experiences and Feedback
User feedback provides crucial insights into the effectiveness and usability of different at-home keratin treatments. Diverse experiences help illustrate the variability in results and the importance of careful consideration of individual hair types. Positive reviews often mention noticeable smoothness and shine, while negative reviews frequently point to issues like uneven results or hair damage.
- Positive Feedback Example: “I’ve been using the ‘Silky Smooth’ keratin treatment for a month, and my hair feels incredible! It’s noticeably straighter and much smoother than before. The shine is amazing, and I’ve received compliments on how healthy it looks.” This positive feedback highlights improved smoothness, straightening, and shine.
- Negative Feedback Example: “I tried the ‘Glossy Locks’ keratin treatment, and unfortunately, the results were very uneven. Some sections of my hair were much straighter than others, and it caused some dryness. I wouldn’t recommend it.” This negative review points to uneven results and dryness, highlighting potential issues with product application or formula suitability.
Pros and Cons of Various Products
Understanding the pros and cons of different products allows for a more nuanced comparison. This enables a better understanding of how the treatment may or may not suit your hair type.
- Product A (Pros): Good straightening results, manageable application, affordable price. (Cons): May not be suitable for all hair types, can cause some dryness if not properly conditioned.
- Product B (Pros): Even straightening across all hair sections, visibly reduces frizz, leaves hair with a healthy shine. (Cons): Slightly more expensive than other treatments, application process is more complex.
Comparative Analysis of Customer Satisfaction
A comparative analysis can aid in identifying trends in customer satisfaction. This data helps consumers make more informed choices based on real-world experience.
| Brand | Customer Satisfaction Rating (Average Score out of 10) | Comments |
|---|---|---|
| Silky Smooth | 7.8 | Good straightening results, manageable application, but some dryness reported. |
| Glossy Locks | 6.5 | Uneven results for some users, potential for dryness. |
| Straight Shot | 8.2 | High customer satisfaction, great shine and manageability. |
Summary
In conclusion, achieving salon-quality results with at-home keratin treatments is achievable with the right knowledge and care. By understanding the different treatment options, safety precautions, and application techniques, you can confidently embark on your keratin journey. Remember to prioritize your hair health and consult with a professional if you have concerns. This guide empowers you to make informed choices and achieve beautiful results at home.
Happy styling!